|
Best Way to Splice Wires?
|
| Ric232 |
Posted on 08/27/08 - 4:26 PM
|

Member
Posts: 194
Comments:
0
Joined: 05/11/08
|
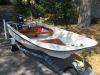
The photo below is my SmartCraft Tach harness. Unfortunately, the connector will not fit through the rigging hole under the dash of my new 130 Sport. Rather than try to open up the hole, I though it would be easier to remove and reattach the connector or cut and splice the wires. Is there a way to remove the wires and reinsert them into this kind of connector? If not, do I want to splice them in the same manner as the two wires that are right behind the main harness in this photo? What are the pieces called that I need to do this right?
Thanks.
Ric232 attached the following image:

[96Kb]
Edited by Ric232 on 08/27/08 - 4:27 PM
Ric
2008 130 Sport
Merc 40hp 4-stroke |
| |
|
|
| Mr T |
Posted on 08/27/08 - 4:47 PM
|
Member
Personal Page
Posts: 230
Comments:
0
Joined: 07/07/08
|
Ric, I work in the electronics world, and there should be a tool that allows you to pull the pins out of the connector. Two of the most common ones I use are from AMP and Molex, typically they are round pin and socket type connectors. For blade type connections, there is a different one one used. Find a decent electronics shop in your area (not Radio shack), and take the connector there. Chances are good they will know how to set you up best.
Hoep this helps,
|
| |
|
|
| Ric232 |
Posted on 08/27/08 - 5:44 PM
|
Member
Posts: 194
Comments:
0
Joined: 05/11/08
|
This is the female end of the connector. No pins. Does that make a difference?
Ric
2008 130 Sport
Merc 40hp 4-stroke |
| |
|
|
| chiburis4 |
Posted on 08/27/08 - 5:48 PM
|
Member
Personal Page
Posts: 53
Comments:
0
Joined: 11/12/07
|
Hi Ric,
Can you give us a shot of the connector looking in?
Sometimes a small screwdriver will disconnect the pins and you can pull the wires back thru.
|
| |
|
|
| Ric232 |
Posted on 08/27/08 - 6:04 PM
|
Member
Posts: 194
Comments:
0
Joined: 05/11/08
|
Sure. Here it is. It would cost at least $50 to replace this harness so I don't want to screw it up.
Thanks.
Ric232 attached the following image:

[65.32Kb]
Edited by Ric232 on 08/27/08 - 6:05 PM
Ric
2008 130 Sport
Merc 40hp 4-stroke |
| |
|
|
| fitz |
Posted on 08/27/08 - 6:11 PM
|
Member
Posts: 2
Comments:
0
Joined: 05/21/07
|
Open up the hole.
|
| |
|
|
| ioptfm |
Posted on 08/27/08 - 6:31 PM
|
Member
Personal Page
Posts: 1533
Comments:
3
Joined: 10/28/06
|
If you can remove the pins & reinsert them or make the hole larger that would definately be the best route to take. If however you have to splice them then I would suggest you not use a crimp connector, but solder the splices and then cover with heat shrink. As another precaution from mositure I would also wrap the entire splices with some sort of waterproof tape also. You want to make sure you keep mositure and water out at all cost
Edited by ioptfm on 08/27/08 - 7:38 PM
Tom
1979 Sport 15' |
| |
|
|
| chiburis4 |
Posted on 08/27/08 - 6:44 PM
|
Member
Personal Page
Posts: 53
Comments:
0
Joined: 11/12/07
|
Don't cut and splice. I would try with one pin and insert a small screwdriver in the inner hole for one wire and see if it pulls free-don't force it. If it goes then fine.
good luck. Steve
|
| |
|
|
| Mr T |
Posted on 08/27/08 - 6:50 PM
|
Member
Personal Page
Posts: 230
Comments:
0
Joined: 07/07/08
|
Piece of cake.
Typically on that type of connector, the small hole on the inside of each slot is the release for the keeper tab. Try a small allen wrench or paper clip to see if it allows the wire to be removed. One tip, before you put the tool in the hole, push the wire from the back as far as you can forward into the plug, then try the tool. While pushing the wire in, insert the tool, and insert it fully as much as you can into the hole. You will feel the tool move the release pin.You should be able to to get the wires out that way.
Label em first, from front and back, double check before you pull any out!
|
| |
|
|
| kamie |
Posted on 08/27/08 - 8:34 PM
|

Member
Personal Page
Project Albums
Posts: 2975
Comments:
3
Joined: 11/04/05
|
Ric,
If pulling apart the connector doesn't work, I would cut the covering back so you had some wire length. The connectors on the other set of wires are called bullet connectors, simular connector type is the insulated disconnects. You then want to make a flexible plug one wire at a time using a male connector on one side and a female on the other. Make sure you have good connections and you should be good to go.
|
| |
|
|
| Blue_Northern |
Posted on 08/28/08 - 6:42 AM
|
Member
Personal Page
Project Albums
Posts: 532
Comments:
5
Joined: 09/04/07
|
I would follow Mr T on this as he seems to be the most knowledgeable. I use crimp connectors that have heat shrink filled with some type of resin. When you heat them the resin melts and really closes up the connection. They can be found all over and typically are transparent blue in color and say water proof on the packaging. Good Luck!
Rob
1973 Outrage/Lo-Pro Conversion |
| |
|
|
| CES |
Posted on 08/28/08 - 10:02 AM
|

Member
Personal Page
Photo Albums
Project Albums
Posts: 2681
Comments:
7
Joined: 04/27/07
|
I would have made the hole larger than to go through the hassle of re-pinning the connector. I've had to many connectors go bad as a result of me trying to do what Ric232 is doing. I hope it works for him though.....
Cliff
1966 13' Sport with a 1993 40hp Yamaha 2 Smoker |
| |
|
|
| Blue_Northern |
Posted on 08/28/08 - 10:30 AM
|
Member
Personal Page
Project Albums
Posts: 532
Comments:
5
Joined: 09/04/07
|
I found a ton of sources for the adhesive lined heat shrink butt connectors -- HERE is one that has 3 sizes available. They are the last ones on the bottom of the page. These things work great and should always be used around the salt water.
Blue_Northern attached the following image:

[22.78Kb]
Rob
1973 Outrage/Lo-Pro Conversion |
| |
|
|
| MW |
Posted on 08/28/08 - 1:57 PM
|
Member
Personal Page
Posts: 1827
Comments:
10
Joined: 01/08/06
|
If your soldering skill's are good, I would cut long away from the plug, solder connections, heat shrink tube, liquid lectric tape the end's of the "Heat shrink" tubing where it meets the wire "OR" just cut the hole bigger, few panel's are "PERFECT", ya gonna change out equipt. anyway at some point.
mw
|
| |
|
|
| Ric232 |
Posted on 08/28/08 - 8:03 PM
|
Member
Posts: 194
Comments:
0
Joined: 05/11/08
|
Mr T wrote:
Piece of cake.
Typically on that type of connector, the small hole on the inside of each slot is the release for the keeper tab. Try a small allen wrench or paper clip to see if it allows the wire to be removed. One tip, before you put the tool in the hole, push the wire from the back as far as you can forward into the plug, then try the tool. While pushing the wire in, insert the tool, and insert it fully as much as you can into the hole. You will feel the tool move the release pin.You should be able to to get the wires out that way.
I'm almost certain you're right about this, but I've been working on it for quite a while today and cannot quite make it work.
Ric
2008 130 Sport
Merc 40hp 4-stroke |
| |
|
|
| Mr T |
Posted on 08/29/08 - 7:40 AM
|
Member
Personal Page
Posts: 230
Comments:
0
Joined: 07/07/08
|
Ric,
I'm 99% on this being the way although I have seen some where the the pins are released from the back. I know there has to be a way to get the pins out, otherwise customers would never buy the plugs. As a service rep, I know you have to get in there somehow....
Like I suggested before, maybe find a small electronic supply house locally and take it in there, there will be some geek like me who will love to show off and demonstrate how "easy" it is!
|
| |
|
|
| Ric232 |
Posted on 08/29/08 - 7:05 PM
|
Member
Posts: 194
Comments:
0
Joined: 05/11/08
|
I went to my local electronics shop (Skycraft Surplus). They told me exactly what Mr. T. did but they couldn't help me actually get the wires out. So I gave up and opened the friggin' hole. What a pain. Not enough space to get a drill into and the battery charger for my friggin' Dremel died. So I had to lay on the floor and file the friggin' thing by hand wearing eye protection and a mask. Finally got the hole big enough (barely) to get the connector through. Everything is installed now and working. I'll report back tomorrow after I get it on the water. My thumbs are friggin' sore from holding the file so firmly. Anyway, everyone have a great friggin' weekend.
Ric
2008 130 Sport
Merc 40hp 4-stroke |
| |
|
|
| CES |
Posted on 08/29/08 - 7:22 PM
|
Member
Personal Page
Photo Albums
Project Albums
Posts: 2681
Comments:
7
Joined: 04/27/07
|
Friggen-A man......at least you "Got er done".
Good job and have fun tomorrow!!
Cliff
1966 13' Sport with a 1993 40hp Yamaha 2 Smoker |
| |
|
|
| Grady95 |
Posted on 08/29/08 - 8:04 PM
|
Member
Personal Page
Posts: 198
Comments:
0
Joined: 11/03/07
|
What, no blood?
Welcome to the wonderful world of rigging my friend! Glad to hear you had a relatively easy time with your cable routing. There are almost never any perfect solutions. Everything is a compromise. The art is in making it work properly and look good, in that order.
Have a great holiday and enjoy the fruits of your labor. Congratulations on a job well done.
Your friggin' friend,
Grady
|
| |
|
|
| Ric232 |
Posted on 08/29/08 - 8:36 PM
|
Member
Posts: 194
Comments:
0
Joined: 05/11/08
|
Grady95 wrote:
What, no blood?
Your friggin' friend,
Grady
Oh, yes, there was blood !! I just didn't want to complain too friggin' much. Geez. I changed out the exhaust system on my prior boat with the big-block Chevy all by myself and that was easier than this. The OEM exhaust weighed about 75 lbs for each side of the engine and I'm 5'7" and a buck forty soaking wet. But I "got 'er done!!"
Edited by Ric232 on 08/29/08 - 8:40 PM
Ric
2008 130 Sport
Merc 40hp 4-stroke |
| |
|