Before Posting, Please Read Our Posting Guidelines Below.
1. Use the full 4 digit year for everything you are asking your question about. Example: 1962, 1988, 2000, 2011 2. Include the correct name of your Whaler model. Example: Montauk 17, Montauk 170, Outrage 26, Outrage 260 3. Include the length when necessary. Example: 16, 17, 18, 20, 22 4. Do not post your email address anywhere on this site as it is already in your user profile.
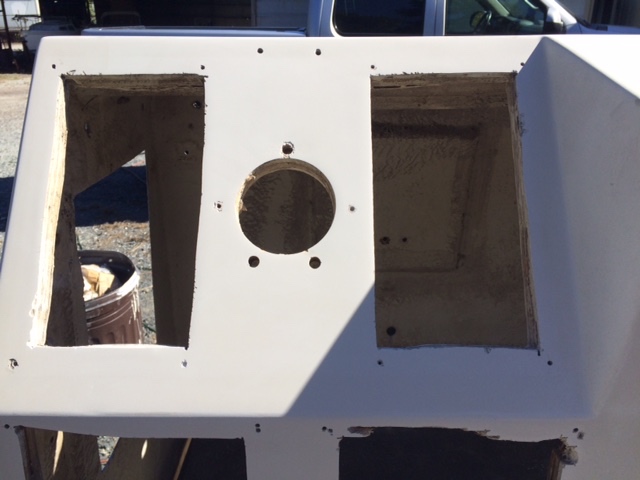
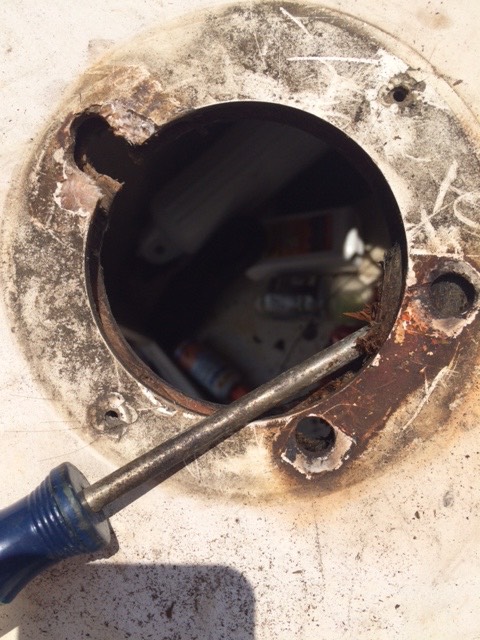
Compare the above to this 2003 middle tier quality boat helm area I recently worked on. The wheel was "wobbly" due to the brackets being rusted through. The core was rotten back one inch from the edge and had to be filled with thickened epoxy and I had to angle grind the corroded bolts out. The screwdriver is seen to be scraping out completely soft core.
NCWhaler attached the following image:
[108.85Kb]
Edited by NCWhaler on 10/18/16 - 6:46 AM
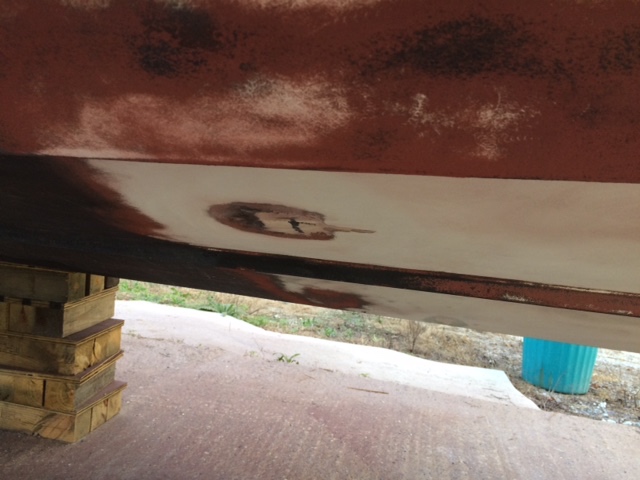
In the belly of the beast: based on the five hours of sanding thus far, I would estimate it will take 20 hours to get all the bottom paint off with 40 grit followed by 80 grit and then 120 to prepare for gelcoat, about 100 square feet by estimation. Note in the picture there is a round area of retained brick red bottom paint. This is a "low spot" caused by the hull sitting on a wobble roller from the PO's trailer setup, others are similar and one shows evidence of prior bodywork. The area is not delaminated from the foam as evidenced by a normal percussion test, but it will be faired level with glazing putty and definitely proves that it is a bad idea to not use keel rollers on a classic Whaler. One caveat, if you place a keel roller on your axle, stiffen the axle by sistering it to a piece of extruded aluminum or other support or the axle may sag and unevenly wear the trailer tires (don't ask me how I know this.)
Additionally the photo illustrates leaving paint on the edges of the chines when using aggressive sandpaper on a sander. These edges are best treated with 120 grit by hand.
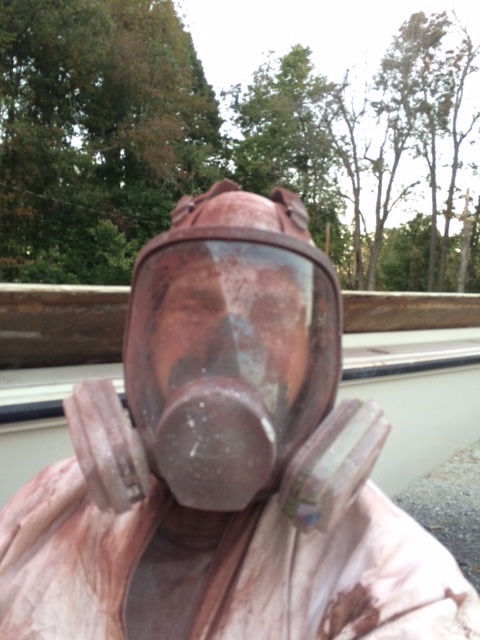
I have said before that removing bottom paint is a difficult, dirty, tedious job- this is after three hours of sanding today: a full face respirator is about $200 but it makes the job oh-so-much more pleasant.
NCWhaler attached the following image:
[111.19Kb]
Edited by NCWhaler on 10/19/16 - 8:18 PM