Wiring a System Check Tachometer to older engine harness.
Posted by Joe Kriz on August 25, 2007 - 4:37 PM
System Check Tachometer Wiring Instructions
If you want to use just the tachometer function of the System Check Tachometer and not all the other warning lights, here are the steps I used. This is an easy way to hook up this type of tachometer to the older systems.
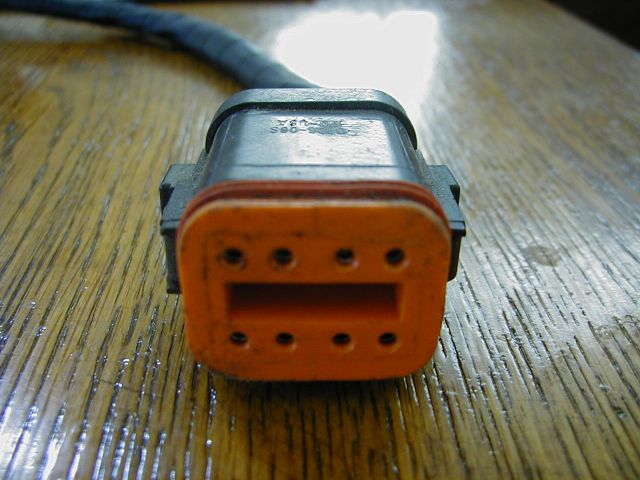
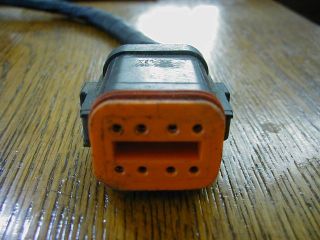
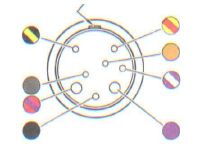
Looking at the backside of the gauge and holding it upright, here is the pin configuration and the back of the plug showing the numbers.
1-2-3-4
8-7-6-5

I only used pin #1, #2, #3....
Using the original wires from the old engine harness, I connected these to the new modular plug:
Pin 1, Purple wire goes to pin 1 - 12V Key Switch On
Pin 2, Black wire goes to pin 2 - Ground
Pin 3, Gray wire goes to pin 3 - Tach pulse
I did not use these pins below because the old system is not setup to utilize this type of warning configuration.
Grounding these pins listed below activate the following on the actual System Check systems:
Pin 4, (tan w/yellow stripe) turns on No Oil light (wire from VRO Pump)
Pin 5, (tan w/black stripe) turns on Low Oil light (wire from VRO Oil Tank)
Pin 6, (tan w/no stripe) turns on Hot light (wire from Overheat Sensor in head)
Pin 7, (tan w/orange stripe) turns on Check Engine light (wire from In-Line Fuel Sensor)
Pin 8, (tan w/blue stripe) used to activate the Warning Horn. It supplies a ground to the horn circuit when any other warning circuit (pins 4 thru 7) are grounded. (this wire goes directly to warning horn)
Parts needed:
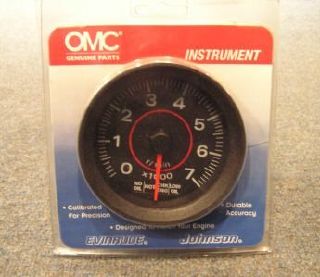
1. System Check Tachometer # 177107 = $(price varies)
(old number was # 176301)
2. 8-Socket Connector # 176296 = $6.95
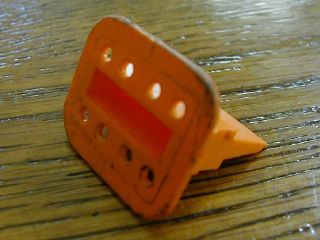
3. Lock Wedge, 8-Socket # 127288 = $1.76
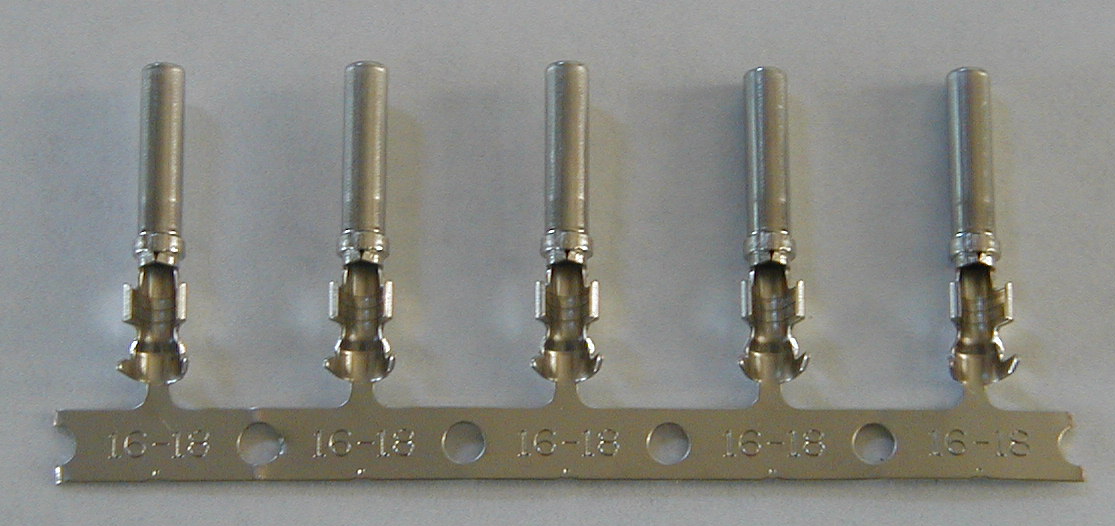
4. Terminal Socket (3 of these) # 514680 = $1.10 each
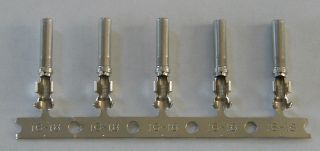
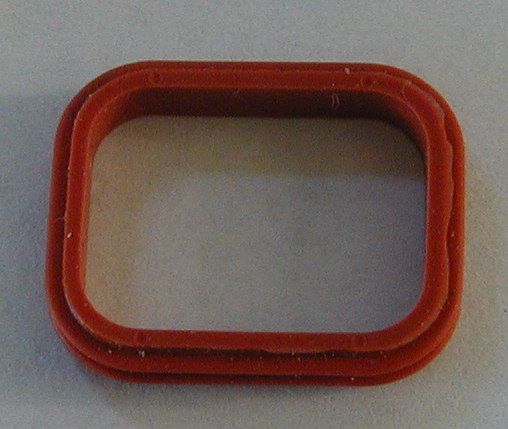
5. Seal, 8-Socket # 514791 = $2.84

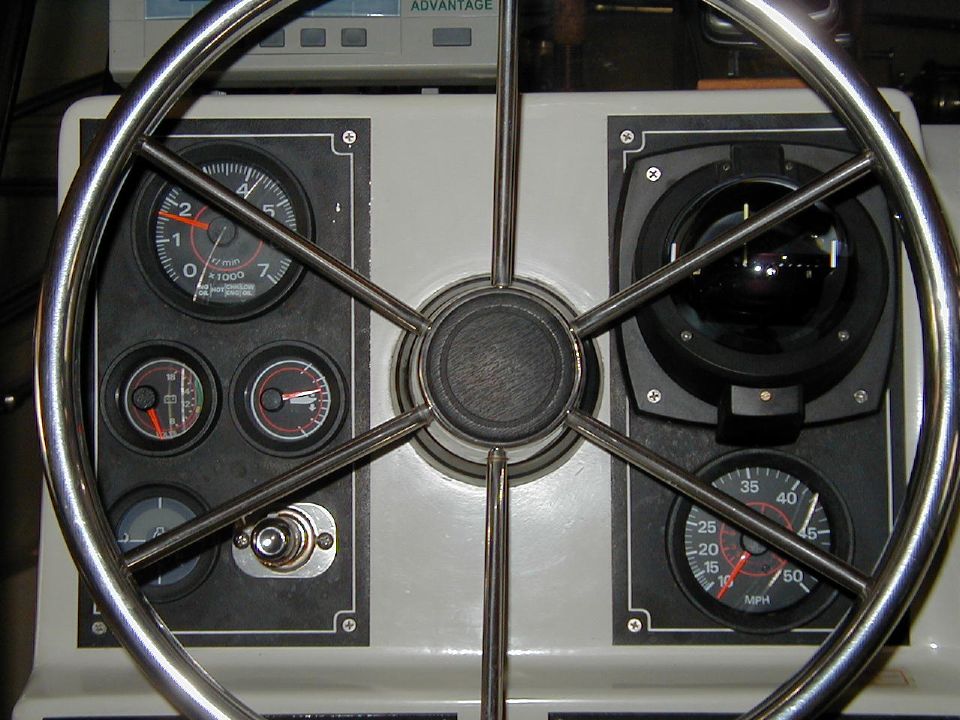
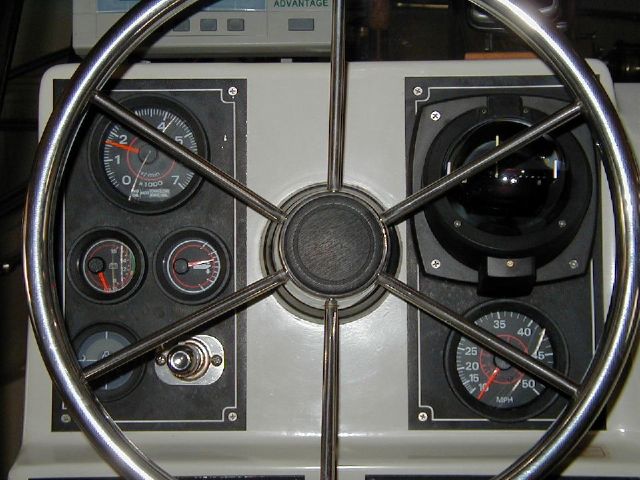
Here is a photo of the finished Tech Series System Check Tachometer installation along with the other Tech Series gauges.
I now have a System Check Tachometer wired into my older, NON System Check wiring harness.
The 4 idiots lights are not hooked up or working at this time. I am still using the older warning horn system.
I am working on converting the old warning horn system over to the new System Check idiot lights.
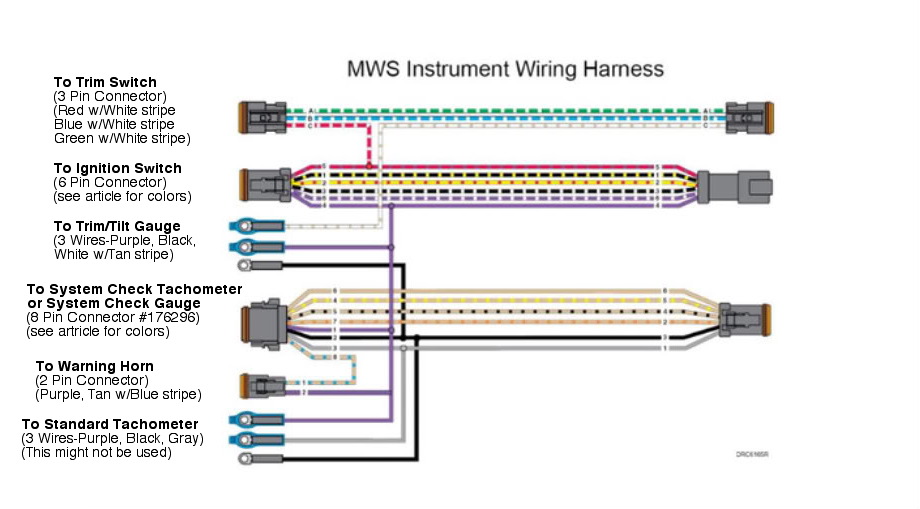
Wiring Harness
To convert the old system over to the newer System Check, there are several choices.
You can buy a conversion kit #176709. About $300
This kit includes a new System Check Oil Tank Sender and a new Wire Harness to Key Switch.
I am not exactly sure what, if anything else, the wire harness has connected to it. I need to find out more.
You can also do the conversion yourself by wiring in the new modular plugs that are needed for the new style Key Switch, Trim Switch, System Check Gauge or Tachometer, and the idiot light wires.
This is the method I chose to see what could be done and what was needed.
The older engine harness with the large RED plug has 8 wires. (The trim harness is separate and has 4 wires)
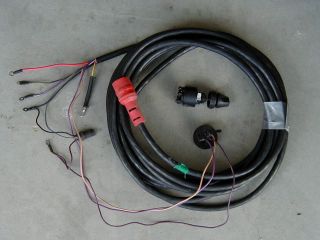
Wires number 1 thru 6 are connected to the key switch.
1. Magneto (Black w/yellow stripe)
2. Start (Yellow w/red stripe)
3. Ground (Black) This wire has changed slightly in the new system... now Black w/white stripe..
4. Accessory (Purple)
5. Battery (Red w/purple stripe)
6. Primer (Purple w/white stripe) (push to choke)
7. Gray wire (tach pulse) (this never went to key switch)
8. Tan wire (to warning horn) (this never went to key switch)
So, the 6 wires we need to connect to the new modular connector for the key switch are numbers 1 thru 6.
These are the same color wires on both the older and newer harnesses.
(click on image for larger view and more detail)

All we need to do is connect these old wires to a new 6 pin modular connector to use the new key switch.
(click on image for larger view and more detail)
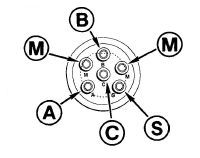
1. "M" Magneto (Black w/yellow stripe)
2. "S" Start (Yellow w/red stripe) (Neutral Safety Switch)
3. "M" Ground (Black w/white stripe) This wire was straight Black in the old harness......
4. "A" Accessory (Purple) (12V key on power)
5. "B" Battery (Red w/purple stripe) (12V power)
6. "C" Primer (Purple w/white stripe)
See this article on BRP Modular Key Switches
The other 2 wires in the old harness are still attached to:
7. Gray goes directly to the tach.
8. Tan goes directly to the warning horn. (This one wire activates all 4 warning horn functions at this time)
The old harness has a total of 12 wires, counting the trim harness wires, from the engine to the dash panel.
The newer System Check harness, which now includes the trim wires, has a total of 15 wires in the harness.
There is a little tricky business with some splices in the harness but essentially, 15 wires total.
So, if we want to connect the 4 idiot lights of the System Check Gauge or Tachometer, we need to add 3 wires.
Right now we only have the 1 Tan wire in the old harness using the old warning horn system.
So we would need to run 3 more Tan wires with stripes from the engine to the System Check Gauge or Tachometer if we want all 4 idiot lights working.
1. Tan (we have this wire already in the old harness which we could use for) = "HOT" from Overheat Sensor(s)
2. Tan w/yellow stripe = "NO OIL" from VRO Pump
3. Tan w/black stripe = "LOW OIL" from VRO Oil Tank
4. Tan w/orange stripe = "CHECK ENGINE" from Fuel Sensor
So far I have spent about $50 and I think I have everything I need to do this job without the $300 kit.
More to come when I work on the rest of this conversion this winter.